Beer-Candied Bacon

Last Sunday, for Father’s Day, I made my hubby beer-candied bacon for breakfast. I found the recipe on Pinterest… I think one of the people I follow had pinned it and, naturally, I HAD to test it out on my hubby. He RAVED about it! I loved it, too. I am definitely going to be making this recipe again.

Beer-Candied Bacon (The recipe can also be found here)
1 lbs thick-cut bacon
1/2 cup brown sugar
1/4 cup + 2 tablespoons beer

1. Oven @ 400F. Combine brown sugar & beer.
2. Set a wire cooling rack on top of a rimmed baking sheet (I used tin foil on the rimmed baking sheet like the original recipe called for, but found that it stuck to my pan and made for difficult cleaning). Dip bacon in sugar/beer mixture and set on top of cooking rack on baking sheet.
3. Oven it for 10 minutes at a time, brushing with sugar/beer mixture at each 10 minute interval until bacon is crisp. (Mine took 3, 10-minute sessions)
4. Cool 1 hour and enjoy!

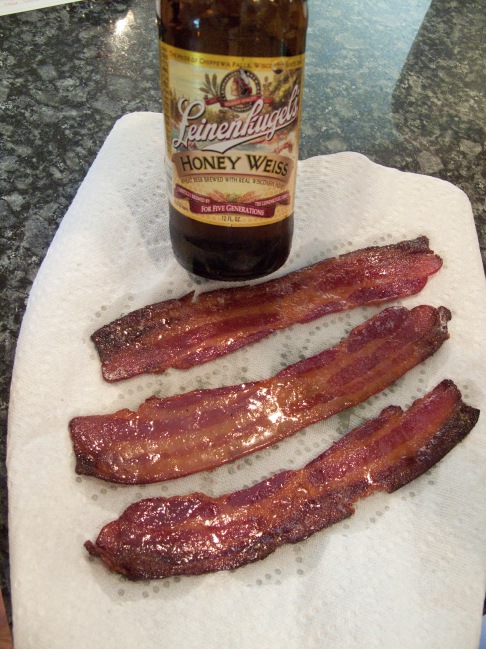
My supplies, including Hormel (just for my friend Kelsey & her hubby) Black Label thick-cut bacon & Leinenkugels Honey Weiss.
Image

The finished product
Image

Swimming!

Today was the day my son Charles had his first swimming experience and swimming lesson! My sister Chastity use to teach swim lessons at Foss Swim School, and I am blessed to have her graciously provide her teaching services to my hubby, Charles, and me, free of charge. Chastity is awesome with kids. I had the pleasure of watching her at work before she quit teaching at Foss and found out firsthand just how great she is at helping kids in the water. I knew from that moment (like 3-4 years ago now!) that I wanted Chastity to teach my future child(ren) how to swim. Also, I saw this video on YouTube…


That video is nothing less that awe-inspiring. I want Charlie to be safe in and around water, and I know the first step is to get him swim lessons ASAP. So today, with the help of my SIL MacKenzie’s father’s pool, Charlie got his first swimming lesson and pool experience! I normally don’t share pictures of my son online so this is a real treat… Here is Charlie with daddy in the pool…
Don and Charlie in the pool
Swim instructor Chastity helps Kyle (our brother) and Kyle’s son Silas with learning how to float on his back…
Kyle, Silas and Chastity in the pool
And finally, a fun picture of Nammy Joan (a.k.a. MaMa Joan) with Chastity and Katsie (our sister Melissa’s girl) in the hot tub, warming up…
Nammy Joan, Katsie and Chastity in the hot tub

Stuff I Love: The Pampered Chef

I’m gonna give you a disclaimer right up front–I love Pampered Chef products and, as a former consultant, I shamelessly hock this stuff for my sister Melissa Guinn, a current consultant. If you want/need anything Pampered Chef, order through her website!

Anyways, my younger sister Chastity hosted a Pampered Chef party at her place this evening and we had a blast! Here’s a picture of Melissa, giving her Pampered Chef spiel and cooking up some BBQ chicken in the Deep Covered Baker.
Image
We played a game while the BBQ chicken was cooking–for every question you asked Melissa about her business, she would give you one ticket. At the end of the question-asking, she drew a ticket out and that person won The Pampered Chef Itty BItty Bevs drink mix. Well, my mom and I pooled our tickets together and guess who ended up winning the drink mix…
Image
My mom, MaMa Joan, the non-drinker!  HAHHAHAHAH! She promptly handed it over to me, because I’m her favorite daughter.
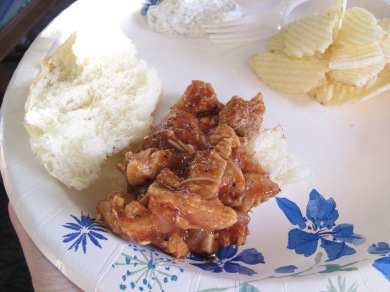
And to top it off, here’s a picture of the completed BBQ chicken on a King’s Hawaiian roll. NOM NOM NOM!
Image

DIY: Father’s Day Cards

For this Father’s Day, I was inspired by this pin on Pinterest. Being my husband’s first Father’s Day, I wanted to celebrate by creating a special card for him from our son, Charles. So, last week my SIL MacKenzie  and MaMa Joan (my mother) helped me make these awesome Father’s Day cards for all the fathers in my life…
Image
MacKenzie’s son Silas even got in on the fun and made his footprint tractor card for his daddy, too!
Image
This project was super easy.
Here’s what I used:
green, yellow, & black acrylic paint
paint sponge brush
painter’s pad paper (to make the cards)
small paintbrush

First, I enlisted the help of my trusty SIL MacKenzie and MaMa Joan to help me swipe green paint on my son’s foot. Then, MacKenzie “stamped” his foot on each card using a rolling motion.  The rolling motion works best for fidgety infants (thanks for the help Mac & mom!)

After the footprint dried, I simply free-hand painted the tractor parts around the footprint according to the pin from Pinterest. It was a fun project and I can’t wait to do it again using another idea from Pinterest!

Side note: My grandfather on my dad’s side actually didn’t see the footprint in the tractor painting at first. Grandma had to point it out to him!

Gigi’s Cupcakes

Thanks to my gorgeous sister Karissa, I am addicted to the most flavorful, fun cupcakes my mouth has ever laid its taste buds on–Gigi’s Cupcakes. My mouth was first introduced to Gigi’s cupcakes a couple years ago when my hubby and I were visiting Karissa in the dirty south. I lovingly refer to the ATL as the dirty dirty. Anyways, a couple of weeks ago I came to find out that there is a Gigi’s Cupcakes location in Minnesota! But alas, it’s all the way over in Golden Valley and I live clear across town. Here’s where my sister Chastity comes in–she is just a doll because when we all met up at my parents house to greet my oldest sister Melissa and her family, Chas had Gigi’s cupcakes in tow. I immediately cued the gates of heaven opening chorus and bowed on my knees, praising Chas and her awesomeness.

So, a few words about Gigi’s and why I love their cupcakes so damn much… Everyday Gigi’s has a different menu of cupcakes available. Today’s menu included mini cupcakes, which is what my sister opted for in order to give me the best value for my taste buds. Today’s assortment included wedding cake, birthday surprise, peanut buttercup and miss princess. My favorite is wedding cake. NOM NOM NOM! See the delectable pictures below!
ImageImage

DIY: KitchenAid Mixer Cover part 2

With the help of MaMa Joan and her awesome sewing skills, the KitchenAid mixer cover was finished today!
Image
MaMa Joan got to work quilting the separate pieces of the cover. She does excellent work, don’t you think?!
Image
After MaMa Joan quilted the pieces, I had to cut them out according to the template size…
Image
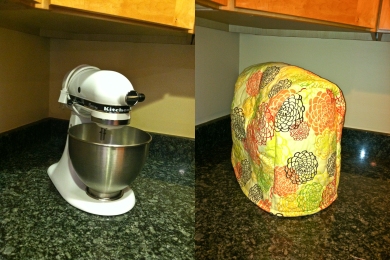
Then MaMa Joan worked her sewing magic and voila!
Image
I apologize for the crappy difference in picture color, but you get the idea! Now my mixer won’t get dusty sitting on my counter top when I’m not using it.  Special thanks to my MAMA!
Once again, here is the tutorial I used to make this project. Thank you to the creator of this awesome tutorial and wonderful idea!

DIY: KitchenAid Mixer Cover part 1

I have to feature another two-part DIY adventure today because my mother and I got a little busy today and we weren’t able to complete our DIY KitchenAid mixer cover. I found the linked tutorial last year while I was searching online to buy a cover for my KitchenAid mixer. My mixer sits on my counter top, and I wanted to protect it from dust in between uses. I found this one on Amazon for $22.69… I have two problems with it– 1) its ugly red color 2) it’s expensive for an ugly red colored mixer cover. Why would I pay $22.69 for something that won’t even match my kitchen! On to the tutorial!
Image
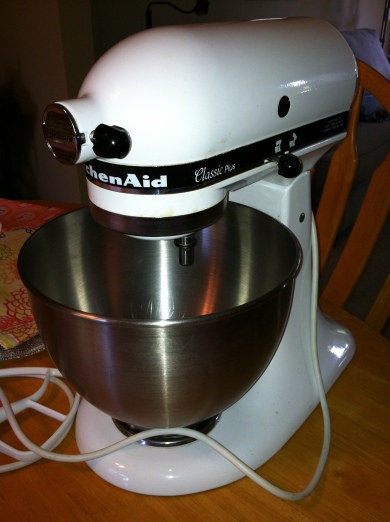
That’s my beautiful mixer. I started making the cover using muslin and the help of my awesome DIY queen mother, MaMa Joan. I cut out the template using the measurements from my mixer. I added a couple extra inches to each measurement for “play room” to make sure it will fit properly.
Image
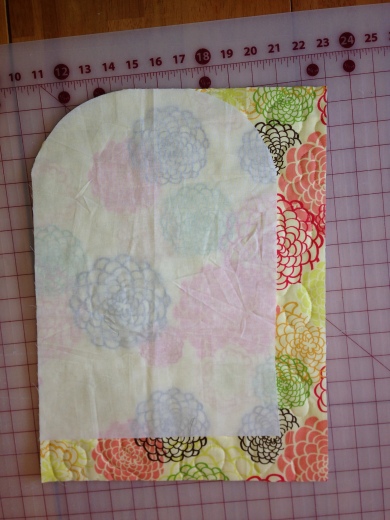
The above is the templates I cut out. The main body measures 34 inches by 16 inches and the front/back panel measures 12 inches by 17 inches.
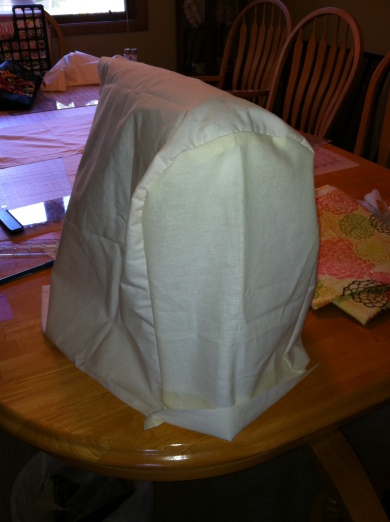
MaMa Joan then baste stitched (it was the first time she used that stitch on her sewing machine and she had to look up the instructions!) it together and then we tossed it on my mixer to see how it would fit…
Image
At the advise of MaMa Joan, I cut an inch off the main body. It did hang over a little too much. I didn’t worry about the bottom edges because I want to wait until the whole thing is put together and make sure the hem hits the counter top when the cover is on the mixer.
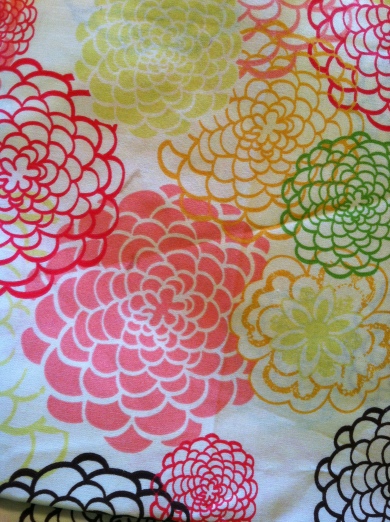
Here’s the fabric I chose from JoAnn’s…
Image
Beautiful, right?!  Then MaMa Joan offered up some of her leftover batting and backing for me to pin together on my fabric. I had to add a couple inches on my template measurements because MaMa Joan will be quilting the fabric! Loves it! Here’s where we had to leave off tonight–the pinning part!
Image
Stay tuned! Tomorrow’s post will feature part 2 and the completion of the KitchenAid mixer cover!

DIY: Gel Air Fresheners part 2

The results of my DIY gel air fresheners… drum roll please…
Image
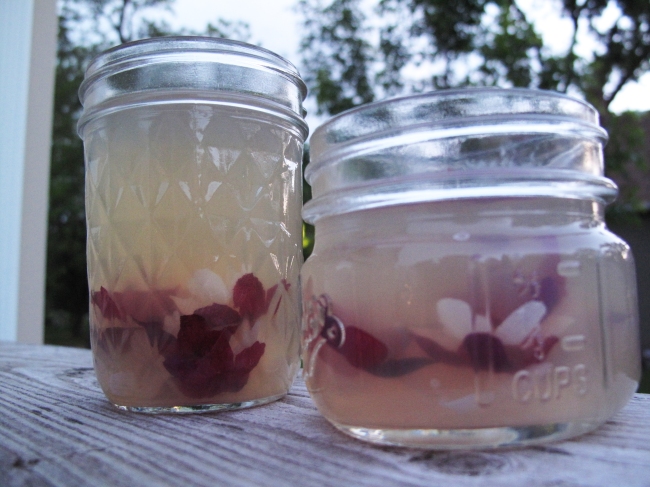
They turned out really pretty, however, the scent is just not there. I did some research and found that I should have added my essential oil AFTER the liquid has cooled. Apparently, essential oil loses its smelly goodness once heat has been applied. NEXT TIME, I will be using my peppermint essential oil and adding it after the liquid has cooled!
Image
Stay tuned for part 3–which probably won’t be seen until Christmas! Until then, I’ll keep you informed on how long the gel lasts. Toot-a-loo!

DIY: Gel Air Fresheners part 1

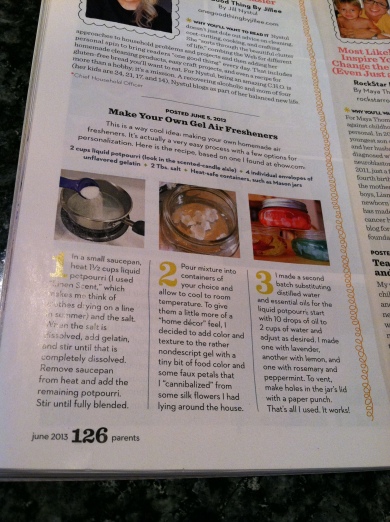
I have been eyeing this DIY project since reading about it in the latest issue of Parents magazine (June 2013).

Image
It’s a DIY recipe for gel air fresheners as seen on the blog One Good Thing by Jillee.Image

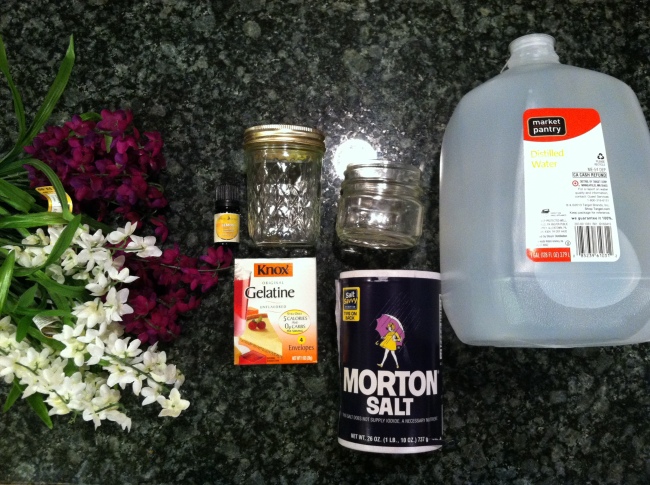
So I got my supplies together and enlisted the help of my hubby. Much to my chagrin, he obliged! A quick shout out to my SIL MacKenzie for helping me chose the silk flowers at Michael’s craft store today (I totally cheated on JoAnn’s, my usual go-to DIY craft store).ImageAs Jillee said in her recipe instructions, I substituted the potpourri with distilled water and Young Living’s Lemon essential oil. A month or so ago, my hubby and I attended an introductory class on Young Living essential oils. While I wasn’t completely sold on the homeopathy of the oils, I did enjoy some of the samples passed around–both the Lemon and Purification essential oils.  I did what any thrifty person would do and took to eBay and bought both oils and a substantial discount than what I would have actually paid through Young Living.

Tonight, hubby and I brewed up our first batch of gel air fresheners using Young Living’s Lemon essential oil… it’s cooling down right now, so tune in tomorrow to see and hear the results!

Dinner: Kate’s Healthy and Delicious Mediterranean Vege Wrap

Okay, I would have just titled this recipe something simple like “Mediterranean Wrap,” but Kate Gosselin says otherwise. Her Healthy and Delicious Mediterranean Vege Wrap is delectable! Hubby loved the taste so much, he had seconds!

Image

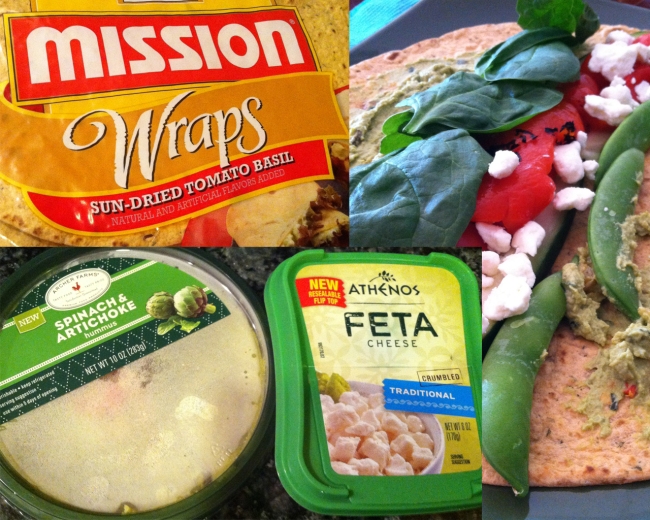
I used Mission’s sun-dried tomato basil wraps, Target’s Archer Farms spinach & artichoke hummus, and Athenos traditional feta cheese. I forgot to snap a picture of the jar of roasted red peppers I used, but there was only one brand available at Target, so that’s what I had to deal with. Still, it was awesome.

Image

And yes, I do follow Kate Gosselin’s blog from time to time. I have enjoyed her Turkey Corn and White Bean Chili on many occasions. I know my sister Chastity loves that recipe. Kate Gosselin also has a cook book coming out in September that you can pre-order now. Someone let my husband know about this book so that he can surprise me for Christmas. k, thx.

*I am an unashamed Kate Plus 8 fan… what can I say…